How to Replace a Light Switch: A Safe, 15-Minute Guide (2026)
Replace a single-pole, 3-way, or dimmer light switch safely in under 15 minutes. Tools, step-by-step photos, wiring diagrams, and when to call an electrician instead.
Most "how to replace a light switch" tutorials skip the one step that actually matters: confirming the wire is dead before you touch it. That's not a checklist bullet — it's the difference between a 12-minute chore and a trip to the ER.
This guide walks you through it the way I'd walk my own family through it. You'll replace a basic switch in 10–15 minutes with a $3 screwdriver and a $15 voltage tester. I'll also tell you the two situations where I'd put the cover back on and call an electrician, because knowing when not to DIY is the whole point.
According to the National Fire Protection Association, electrical failure or malfunction causes an average of 46,700 home fires per year in the US — roughly 13% of all home fires. Most are preventable with one habit: kill the circuit before you touch a wire.
Before You Start: Figure Out What Kind of Switch You Have
Pull the switch plate off (one or two small screws) and look at the existing switch. The number of brass terminal screws on the side tells you everything.
| Screws (excluding green ground) | Switch type | What it controls |
|---|---|---|
| 2 brass | Single-pole | One light from one location — the most common type |
| 3 screws (2 brass + 1 dark) | 3-way | One light from two locations (staircase, hallway) |
| 4 screws + common | 4-way | One light from three+ locations (rare in homes) |
| 2 terminals + dial/slider | Dimmer | Variable brightness, often incandescent-only unless LED-compatible |

Buy the same type you're replacing. A $4 single-pole switch and a $12 3-way look nearly identical in the store — the wrong one will bolt in fine and then not work, and you'll be making a second trip to Home Depot at 9pm. Don't be that person. Take the old switch with you.
If you're swapping to a dimmer, check two things: your bulbs must be labeled "dimmable" (most modern LEDs are, but not all), and the dimmer must be rated for LED loads. Generic incandescent-era dimmers will make LED bulbs flicker, buzz, or burn out fast.
What You'll Need
Tools
- Non-contact voltage tester ($12–$20). The single most important tool in this entire project. Don't skip it — a multimeter works too, but a pen-style tester is simpler and safer for beginners.
- Flathead screwdriver (for the plate and terminal screws)
- Phillips #2 screwdriver (for the mounting screws)
- Needle-nose pliers (for bending wire loops — optional but helpful)
- Flashlight or headlamp (because you just turned off the power — no, your phone isn't ideal, you need both hands)
Materials
- New light switch — must match the old one's type (see table above). Single-pole runs $2–$6, 3-way runs $4–$12, dimmers run $15–$35.
- Wire nuts (usually 2–3) in case existing ones are damaged — $3 for a pack.
- Electrical tape — $2, optional, for extra insurance on terminal screw connections.
Total material cost: $3–$25. A handyman charges $75–$150 for this same job.
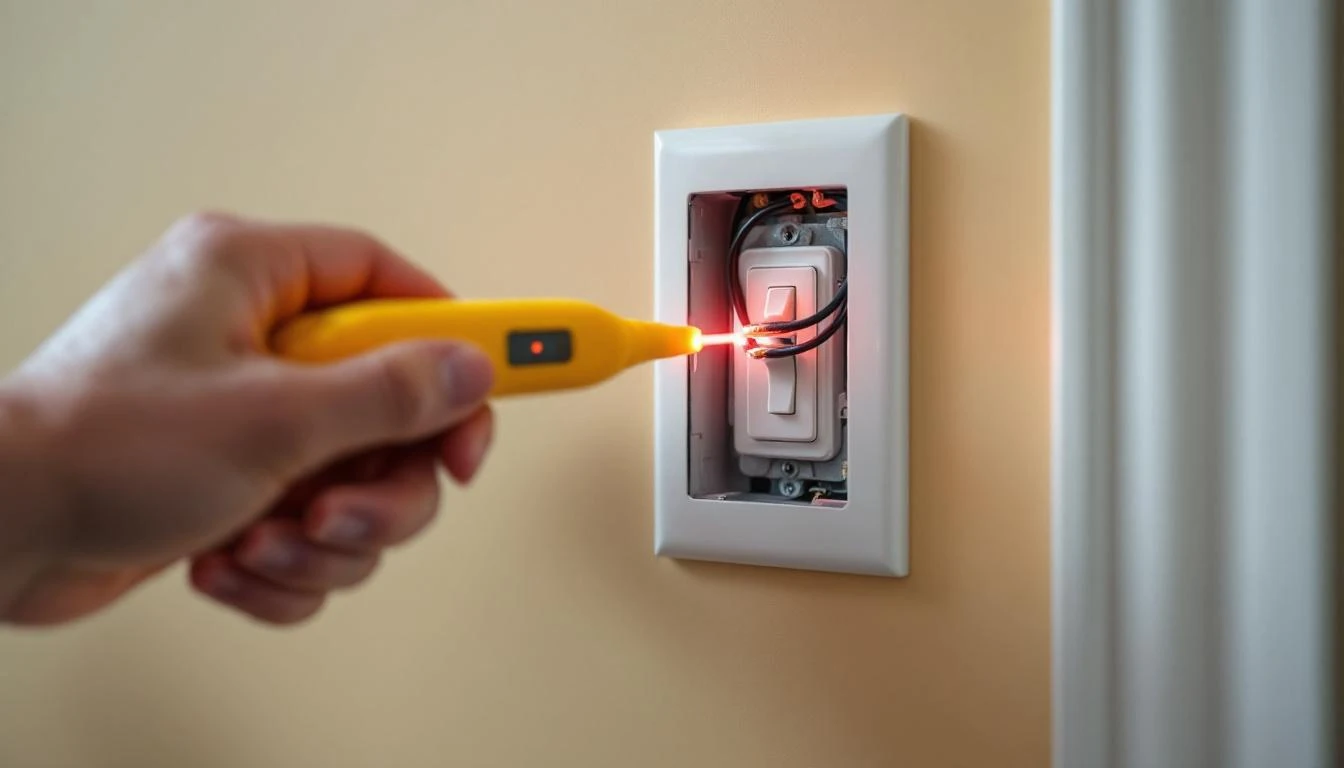
Step 1: Kill the Power at the Breaker (Not the Wall Switch)
Flipping the wall switch off turns the light off. It does not de-energize the wiring inside the box. Hot current still flows to one of the terminals, and touching it will hurt you.
Go to your electrical panel and flip the breaker that controls this switch. If your breakers aren't labeled (they often aren't), turn on the light you're about to work on, then flip breakers one at a time until the light dies. Label that breaker with a piece of tape right now — future-you will thank you.
Now verify it's dead. Hold your non-contact voltage tester against the wires at the switch (before touching them). If it beeps or lights up, you turned off the wrong breaker. Try again. If it stays silent, you're safe to work.
This is the single step that separates "easy DIY" from "emergency room." Do it every time, even on jobs you've done before.
Step 2: Remove the Old Switch
- Unscrew the cover plate (two small screws) and set it aside.
- Unscrew the two mounting screws holding the switch to the metal box.
- Gently pull the switch out of the box — there will be 2–4 inches of wire behind it. Pull straight out; don't yank.
- Take a photo of the wiring with your phone before disconnecting anything. If something goes wrong, you can put it back exactly as it was. This 10-second step has saved me on dozens of jobs.
Now note which wire goes where. On a single-pole switch, you'll typically see:
- Black (or red) wire on one brass screw — this is your hot wire
- Black (or red) wire on the other brass screw — this is your switched hot going to the light
- Bare copper or green wire on the green screw — this is your ground
- White wires may be bundled together with a wire nut in the back of the box (neutrals, pass-through)
On a 3-way switch you'll also see a common terminal (darker screw) with one wire on it — the other two terminals have the "traveler" wires. Note the common wire specifically; it must go back on the common terminal of the new switch or the circuit won't work.
Step 3: Transfer the Wires to the New Switch
Loosen the screws on the new switch and attach the wires in the same positions you just photographed.
Two ways to attach a wire:
| Method | When to use | Pros | Cons |
|---|---|---|---|
| Loop around screw (side-wire) | Default — most reliable | Strongest mechanical connection | Slightly slower |
| Push-in back-wire | Only if the switch is labeled for it | Fast | Higher failure rate over time — pros generally avoid these |
For side-wire: form a small hook in the exposed copper with needle-nose pliers, loop it clockwise around the screw (so tightening pulls the loop closed, not open), and tighten until the wire is firmly pinched. No copper should extend past the screw head.
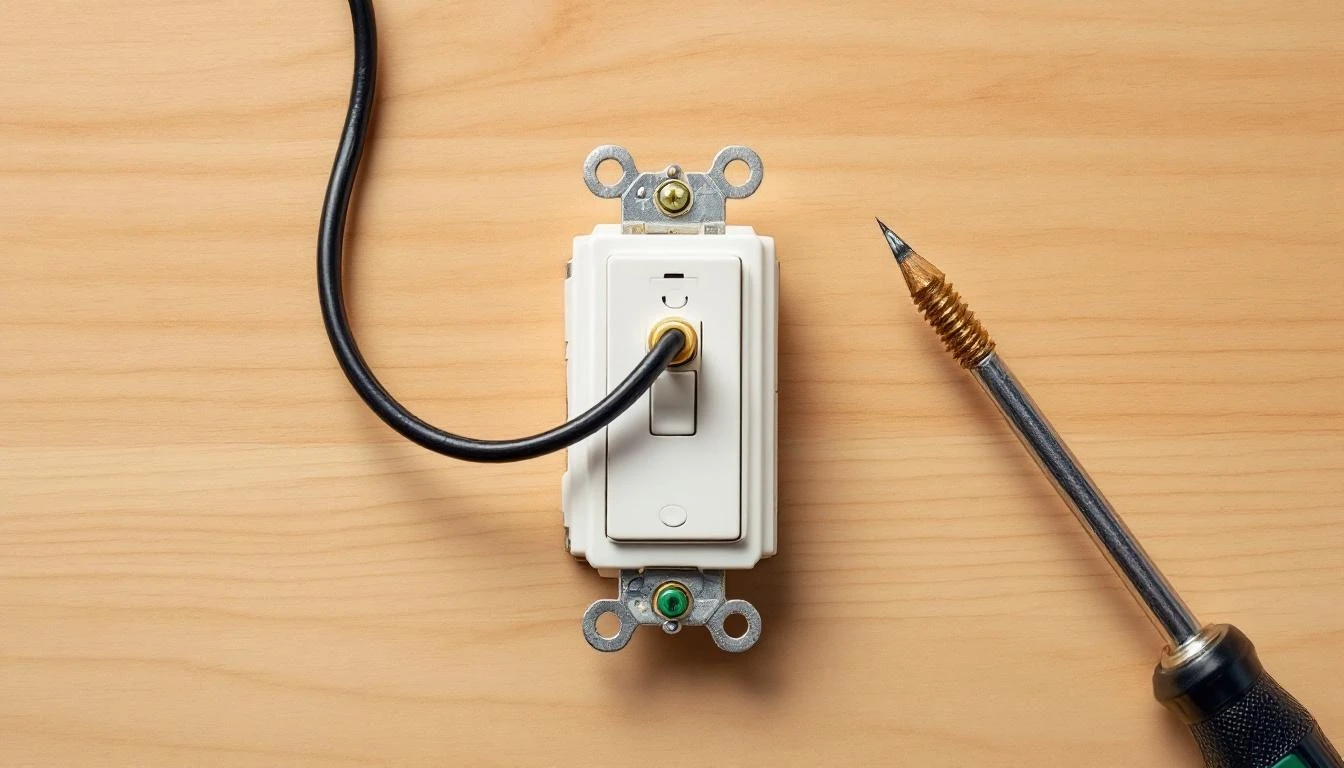
Match exactly what you photographed. On a single-pole switch it doesn't matter which brass screw gets which black wire — the switch isn't polarized. On a 3-way switch, the common wire must go on the common terminal. On a dimmer, follow the manufacturer's wiring diagram on the back of the package (colors vary).
Attach the ground wire (bare copper or green) to the green screw on the new switch.
Step 4: Mount the Switch, Test, and Button It Up
- Gently fold the wires back into the box in an accordion pattern — don't cram them.
- Line up the switch and drive the two mounting screws until it sits flush. The switch should be vertical and centered.
- Put the cover plate back on.
- Go back to the breaker and flip it on.
- Test the switch. Light should come on. Flip it again. Light should go off.
If the light doesn't work:
- No light at all → breaker still off, or the switched-hot wire came loose. Kill power again, open it up, check connections.
- 3-way only works from one location → you put a wire on the wrong terminal. Common wire must be on the common terminal.
- Dimmer buzzes or flickers → incompatible bulbs. Check that bulbs are labeled "dimmable" and the dimmer is rated for LEDs.
Done. You just saved yourself $75–$150.
Pro Tips (The Things Tutorials Don't Tell You)
- If the old switch is wired with aluminum (silvery, not copper) — stop. Aluminum wiring requires special Al/Cu-rated switches and anti-oxidant paste. Homes built between 1965 and 1973 often have this. This is a job for an electrician, full stop. The US Consumer Product Safety Commission found homes with aluminum-wired branch circuits are 55 times more likely to have one or more connections reach "Fire Hazard Conditions" than homes wired with copper — aluminum expands and contracts more than copper, and a bad junction can smolder for months before igniting.
- If the box feels unusually warm or smells burnt — don't touch it. Kill the breaker, leave it off, and call an electrician. You have a problem bigger than a switch.
- Screws that won't tighten back down — the threaded holes in the metal box are stripped. Don't force it. Use a "switch extender" (a 50-cent plastic spacer) or add a longer screw. If the whole box is loose, it's a re-mounting job.
- Switches with no markings — cheap imported switches sometimes come without UL listing. Return them. A $2 savings isn't worth an uncertified device on a live circuit. Look for "UL Listed" or "ETL" markings.
- Leviton vs. Lutron vs. house brand — for single-pole switches, house brands are fine. For dimmers and smart switches, spend the extra $10 on a name brand (Lutron, Leviton) — the electronics in cheap dimmers fail within 1–2 years.
Common Mistakes I See Handymen Fix All the Time
- Wrong switch type. Homeowner buys a single-pole for a 3-way location, bolts it in, nothing works, calls me. Ten minutes and a $7 switch later, everything works. Read the screw count before you shop.
- Back-wired push-in connections on old switches. These fail over time — wire loosens, connection arcs, paint around the switch plate turns brown from heat. Always side-wire around the screw.
- Overcrowded box. If you can't fold the wires back in without forcing them, the box is too full. Code limits box fill — overfilling causes heat buildup. This is an "add a bigger box" job.
- Ground wire ignored. If there's a ground wire in the box, connect it. A $0 step that significantly reduces shock and fire risk.
- Not testing with the breaker on. People button everything up, turn the breaker on, and walk away. Then the switch fails at 11pm. Test the switch before the cover plate goes on — it takes 30 seconds and saves a re-do.
Time and Cost Reality Check
| Scenario | DIY cost | Handyman cost | Electrician cost |
|---|---|---|---|
| Single-pole swap | $3–$10 | $75–$150 | $100–$200 |
| 3-way swap | $6–$14 | $90–$175 | $125–$225 |
| Dimmer install | $15–$35 | $100–$175 | $125–$250 |
| 4 switches, same visit | $15–$40 | $150–$300 | $200–$400 |
Handyman pricing pulled from Fixr, HomeAdvisor, and Thumbtack 2025 averages. Electrician pricing is higher because of licensing, permit-carrying, and liability insurance overhead — which is worth it when you actually need them.
When to Call a Professional Instead
Stop and hire someone if any of these are true:
- Aluminum wiring in the box (silvery, not copper)
- Cloth-insulated wires (homes pre-1960)
- Smoke, char, or burnt plastic smell anywhere in the box
- Box is physically loose or broken
- You're adding a new switch location (not a swap)
- Your panel is federal Pacific, Zinsco, or Challenger (known-hazardous panels — any electrical work on these is an electrician-only job)
- You flipped the breaker off and the voltage tester still beeps — this means the circuit isn't wired the way it should be, and it's not a DIY situation
None of those apply? You're looking at a 15-minute job. Go do it.
Any of them apply? Find a handyman near you or hire a licensed electrician. A $150 service call on a switch you weren't sure about is the cheapest insurance you'll ever buy.
One Last Thing
I run HandymanCan because the gap between "DIY" and "call someone" is wider and scarier than it needs to be. A switch swap is genuinely easy. A switch swap in a 1955 house with aluminum wiring is genuinely dangerous. This guide tries to tell you which is which, instead of pretending everything is 4 easy steps.
If you got through this and it helped, that's the whole point. If it made you realize you want someone else to do it — that's also the whole point. Find a handyman →
Frequently Asked Questions
Do I need to turn off the power to replace a light switch?
Yes — always. Flip the correct circuit breaker off at the panel, then verify the switch is dead with a non-contact voltage tester before touching a wire. Turning off the wall switch alone is not enough — hot current is still present at the switch terminals. The National Fire Protection Association attributes an average of 46,700 home electrical fires per year in the US to electrical failure or malfunction, causing roughly 390 deaths and $1.5 billion in property damage (NFPA, Home Electrical Fires, 2023).
Can I replace a light switch myself without an electrician?
Yes, if it's a like-for-like swap of a single-pole, 3-way, or dimmer switch in a standard residential box. You don't need a permit in most US jurisdictions for this. You do need an electrician if: the box has aluminum wiring, you're adding a new switch where none existed, the wires are cloth-insulated (pre-1960s), or anything smells burnt. When in doubt, hire a licensed pro — a $150 service call is cheaper than a house fire.
How do I tell a single-pole switch from a 3-way switch?
Count the screws on the side of the old switch (ignore the green ground screw). A single-pole switch has 2 brass screws. A 3-way switch has 3 screws — 2 brass (travelers) plus 1 darker screw (the common). 3-way switches control one light from two locations, like top and bottom of a staircase. If you pull out a switch with 3 screws and buy a single-pole replacement, nothing will work — match the type exactly.
Why is there no ground wire in my switch box?
Homes wired before roughly 1965 often lack a ground wire at switch boxes. A modern switch will still function without a ground, but it's less safe. Code-compliant options: (1) use a switch in a metal box that's properly grounded via metal conduit, (2) run a new ground wire, or (3) install a GFCI-protected circuit at the breaker. If you're not sure, have an electrician inspect — ungrounded circuits are a known fire/shock risk in older homes.
My new switch has a green ground screw but my old one didn't — what do I do?
Modern switches (post-2011 NEC) are required to have a ground terminal. If your box has a bare copper or green ground wire, connect it to the new switch's green screw. If your box has no ground wire, cap the green screw with a wire nut and install the switch anyway — it will function, but the metal yoke won't be grounded. Flag it for an electrician at your next remodel.
How much does it cost to hire someone to replace a light switch?
A handyman typically charges $75–$150 for a single switch swap, with most jobs billed as a 1-hour minimum visit. Licensed electricians charge $100–$250 for the same job because of overhead and permit-carrying requirements. If you have 4+ switches to replace in one visit, the per-switch cost drops to $30–$60. Find a [handyman near you](/handyman-services) if you'd rather not DIY.
Your skills deserve to be seen.
Join handymen who use HandymanCan to get found by local clients — completely free.
No credit card. No catch. Takes 5 minutes.
Related Articles
How to Unclog a Drain: The Safe Order of Operations (2026)
Unclog a kitchen, bathroom, or shower drain without chemicals in most cases. Plunger, baking soda, snake, P-trap — plus the drain cleaner safety rules the bottle doesn't mention.
How to Patch a Hole in Drywall: Small, Medium, and Fist-Sized Fixes
Patch any drywall hole — from nail pops to a doorknob-sized crater — in under 2 hours. The right method for each hole size, the tools that matter, and how to make the patch invisible after paint.
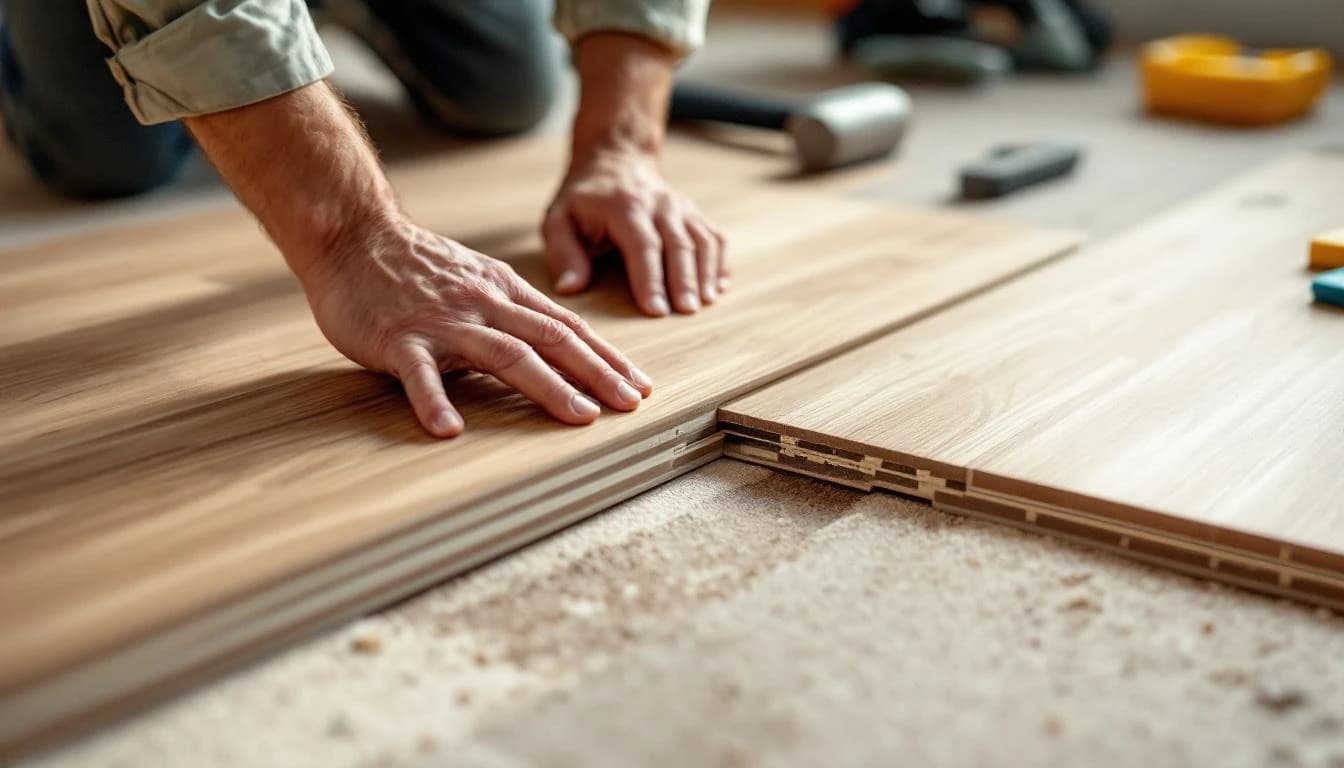
How to Install Laminate Flooring: A Realistic Weekend DIY Guide
Install laminate flooring yourself in 1-2 days for a 200 sq ft room. Subfloor prep, underlayment, click-lock planking, expansion gaps, and trim reinstall — plus what to check before you buy for indoor air safety.